
Fill Tools
First appeared in Issue 542 of The Jester, June 2020
Like most painting and drawing software, Clip Studio comes equipped with a Paint Bucket Fill tool, useful for filling areas of your illustration with flat colour.
![]()
Clip Studio’s paint bucket (or Fill tool as it’s referred to in Clip Studio) has a useful feature that I stumbled upon recently: it can make use of a thing called a “Reference Layer”
When you select the Fill tool, you should see the default Sub Tool [Fill] panel pop up. If not, go to the Window menu at the top of the screen and select it from there. It looks like this:
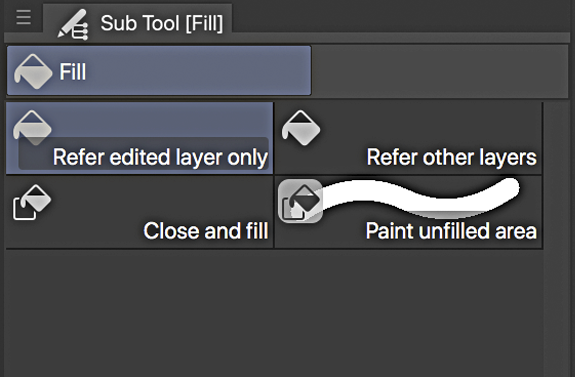
The default Fill tool is the “Refer edited layer only” which will only fill colour into closed areas on the layer those areas are on. So if you draw a square on Layer 1, the Fill tool will only fill that square on Layer 1.
Normally, you’d want the colour to be filled on a different layer, ie if you had your linework on one layer, you would like to use the fill tool to add colour on another layer below the linework layer, but using the linework layer as the layer that controls where the fill takes place.
You can achieve this by selecting the “Refer other layers” option his Fill tool version responds to the presence of shapes and lines on all the other layers in your artwork, so you could create a layer below your linework, click in the linework layer and the fill colour would appear on the layer below.
But there are times when you could do with a little more control than this, and sure enough Clip Studio, with its seemingly obsessive attention to control detail, provides this.
With the Refer edited layer only Fill tool selected, go to the Window menu and select Tool Property [Refer edited layer only] The Tool Property panel appears:
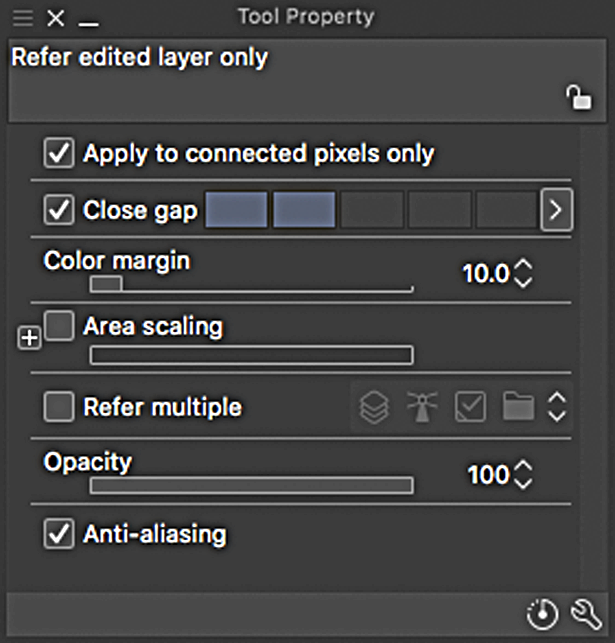
Click the little checkbox in the Refer multiple section and some new icons appear. Click on the little symbol that looks like a lighthouse:

This is the Reference Layer icon. When this is selected, the Fill tool will now only respond to the shapes and lines on a layer designated to be the Reference layer. You can fill on any layer, but the tool will take its instructions from the Reference layer.
You can designate any layer to be your reference layer by going to your Layers palette, selecting a layer, and then clicking on the lighthouse icon in that palette:

Typically, your linework layer would be the reference layer, but it could be any one you choose.
You can only have one Reference layer active at a time, and it will be indicated by a lighthouse icon next to its name in the Layers palette.
Another setting that is useful to have for this version of the Fill tool is the Area scaling setting. Click the little checkbox in that section to activate it, and set its value to 2.

What this setting does is to expand the area that the fill will occupy once it reaches the edge of an enclosed area. So in this case, once you click in an enclosed area on the reference layer with the layer below it active (ie the colour layer) the fill will not just fill the area you’ve chosen, but will extend itself by a further 2 pixels. This means that there will be no annoying white gap between the edge of the fill and the edge of the linework shape.
The fill has a 2 pixel “bite” into the linework edges.
Bigger positive values will give more bite, but you can apply negative values too, which will generate a gap between the linework area and its fill. (sometimes you want that effect).
Click on the little + icon to get options on how the corners of the fill appear.
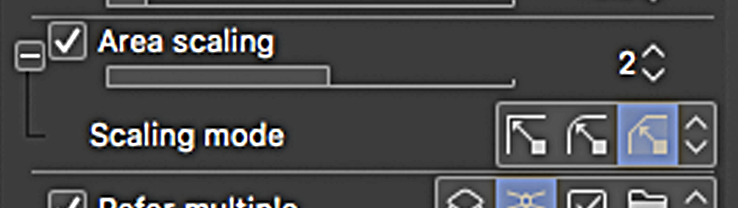
Options for the types of corners of the fill

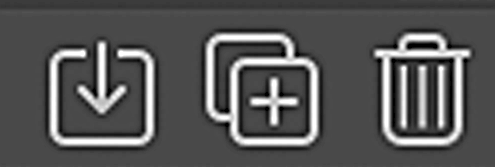
Now you have altered the settings of the Fill tool, it no longer behaves like its old self. But you can revert the settings back to the default by clicking on the icon
next to the spanner icon at the bottom right corner of the Tool Property panel. Before you do that,
you might like to create a copy of your altered Fill tool for future use. Just click on this icon at the bottom right corner of the Sub Tool [Fill] panel
A panel will appear giving you the option to rename this copy and even give the new icon a colour. (There are numerous other options you can tinker with too if you have a couple of hours to spare).
When you’ve done that, return to your original Fill Tool and revert its setting back to the default.
Alternatively of course, you could have made the copy first and then altered the settings.
There is another default tool in the Fill Tool panel that is a really
nifty one. I haven’t seen its like before. It’s the Paint unified area tool.
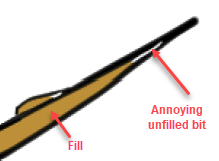
Sometimes when you’re using the Fill Tool to fill a shape that has some really awkward narrow sections, the fill will often not go completely into the extremes of these narrow bits.
You get left with an annoying gap that you usually have to correct with careful application of the Brush Tool
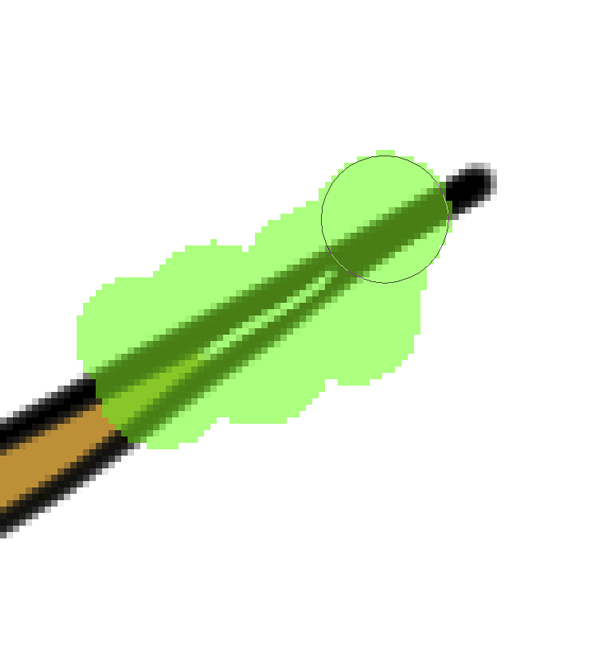
To fill in these annoying gaps, Select the colour layer your fill is on, then choose the aforemen- tioned Paint unified area tool. Place your stylus tip onto an area of the succesful fill colour and without lifting your stylus simply scribble over the unfilled area.
The tool leaves a trail like a green highlighter marker while your stylus is in contact with your tablet .
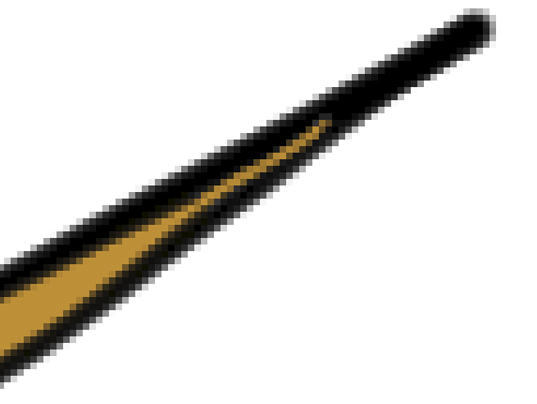
When the whole unfilled section is covered, lift your stylus from your tablet (or screen if you’re drawing direct onto one). The green highlighting will disappear and that annoying unfilled area will be filled!
Whoa! Awesome!
More nerdiness next month chums!

No comments yet.