By Rich Skipworth
This article appeared in Issue 533 of The Jester magazine, August 2019
** Click on any image to enlarge ***
I’ve been tinkering with some of the default pens in Clip Studio, and one I found a joy to use is the Mapping Pen. It’s incredibly responsive. Clip Studio seems to take full advantage of all the 1000 plus levels of pressure sensitivity of my Wacom. More so than Photoshop seems to.
Here’s some of the Pen settings malarkey I found to be cool and nifty…
Pen palette
Hit P on the keyboard, or click the pen icon in the toolbar and the Pen palette appears
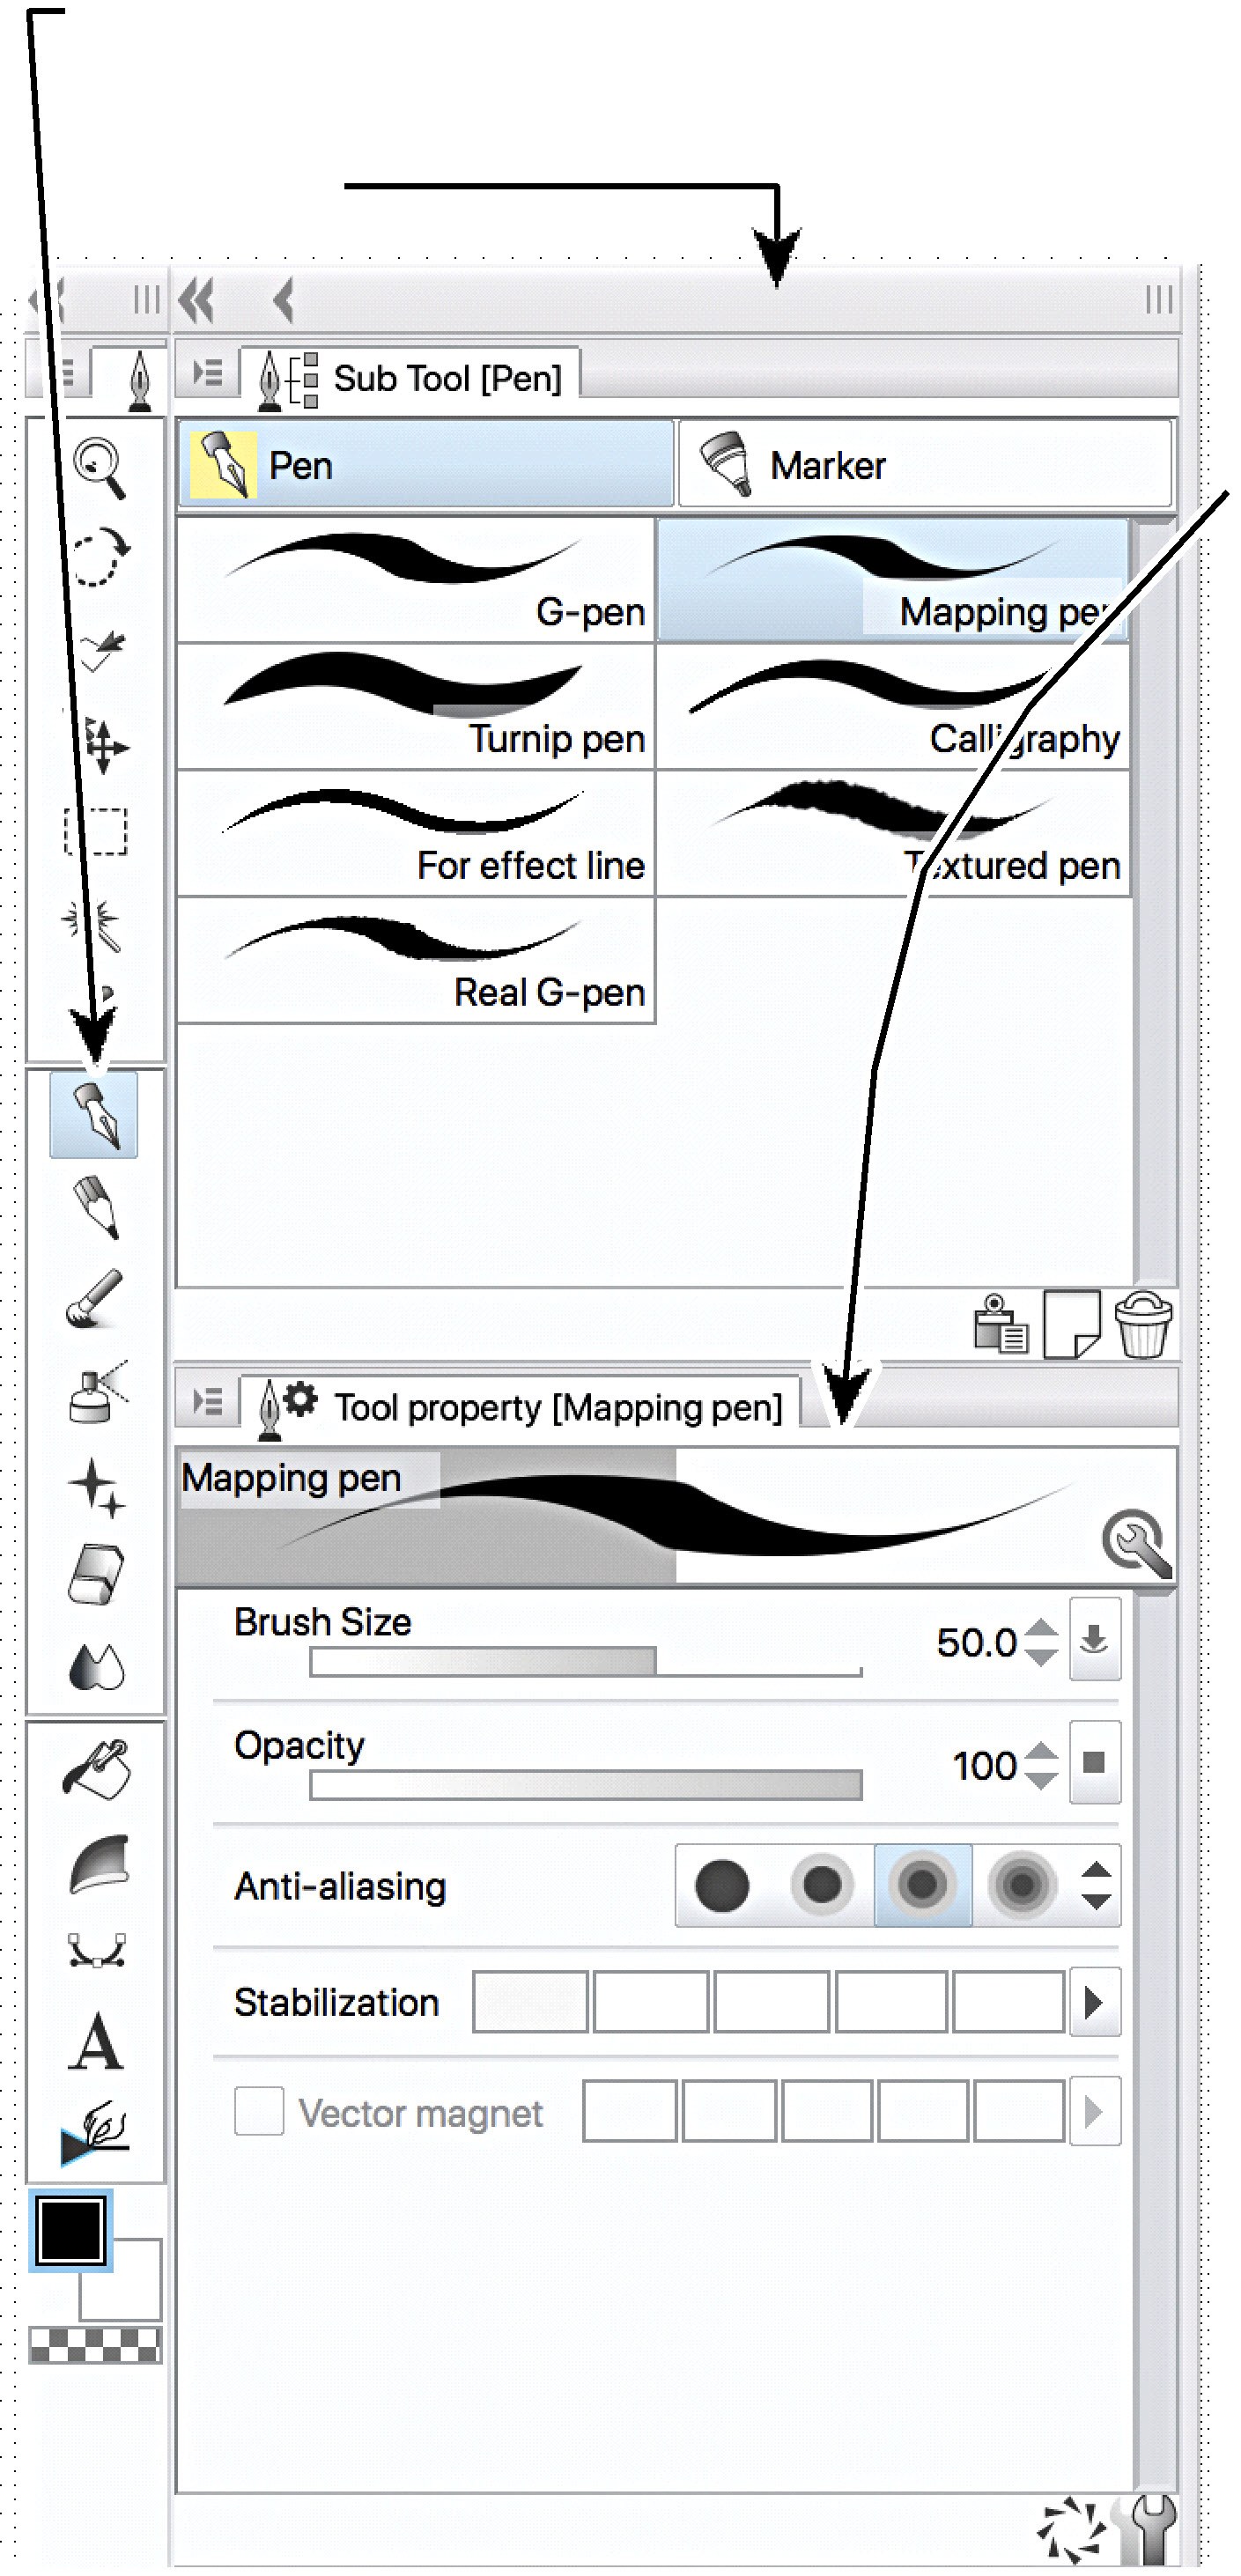
This reveals the default set of pens and markers. Click the pen tab to get the pens visible.
The pen variants on display, G-pen, Turnip pen (wha?…) etc are referred to as “sub tools” of the main Pen type. It’s always handy to have the Tool Property palette visible. You can make it available via the Window menu at the top of the screen. This palette gives you control over the size of the pen, its opacity, its anti-aliasing (i.e. how smooth the edges of your line look) and the Stabilization, which is how closely the pen matches your hand movements. This can give you nice smooth curves at its highest setting, or can accurately match the natural wobbliness of your hand at its lowest setting.
You can adjust these settings in the Tool property palette to customise your pen. When you’re happy with the result you can make this adjusted version a kind of default setting by clicking on this icon in the palette:

A shaded rectangle appears around the icon to show it is selected and a small spanner symbol appears next to the sub tool’s name in the Sub tool palette:

Suppose you had set the opacity of your Mapping pen to 50% and then clicked on the spanner icon. Your pen will now draw with (obviously) a 50% opacity line. You might then want to temporarily use 100% opacity so you adjust the slider. If you now choose any other sub tool, say the mysterious Turnip pen, you will see that your Mapping pen opacity will return to the 50% setting you chose when you clicked the spanner icon. It’s a weird temporary default that seems to be a unique Clip Studio feature. It works with all the settings you apply to a brush or pen, not just opacity.
If at any time you decide that all this adjusting and twiddling with setting has generally just cocked your pen or brush right up, then you can click on this icon next to the spanner icon in the tool property palette.
![]()
This resets your selected sub tool to its default setting. If a sub tool is locked with the spanner icon, it will default to the settings you applied when you “spannered” it. If you un-spanner it and then click the reset icon, the sub tool will revert to its true default.
Sub Tool Detail palette
There is another palette you can use to tinker with your sub tool settings, it’s the Sub Tool Detail palette, available via the Window menu at the top of the screen. Warning! This palette is like the black hole of the tool adjustment universe.

It will suck you in, and you’ll spend hours tinkering with it’s endless settings. In here, you have access to a brain-frying multitude of adjustments.
You can change the brush tip shape, the texture the brush uses, the water colour properties of your brush…it goes on and on. If you’re going to experiment with this palette, I recommend first creating a duplicate of one of your sub tools to experiment with.
To do this, select a sub tool, then click this icon in the Sub tool palette.
![]()
A dialogue box will appear to enable you to give a name to your duplicate. So far I have only had a muck about with the Brush Shape control, and it’s fascinating! You are presented with a range of different “Brush shapes” . Click on one you like the look of and then click on the “Apply brush shape” button at the bottom of the panel. Sure enough, your sub tool now draws with the new Brush shape.
Here’s some examples, all variants on the basic Mapping Pen:
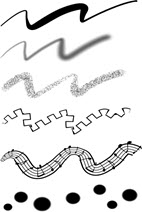
Awesome! And so easy to use! More next ish!

No comments yet.