RICH SKIPWORTH’S VOYAGE INTO THE UNKNOWN!
This Article appeared in Issue 36 of The Jester magazine, October 2019
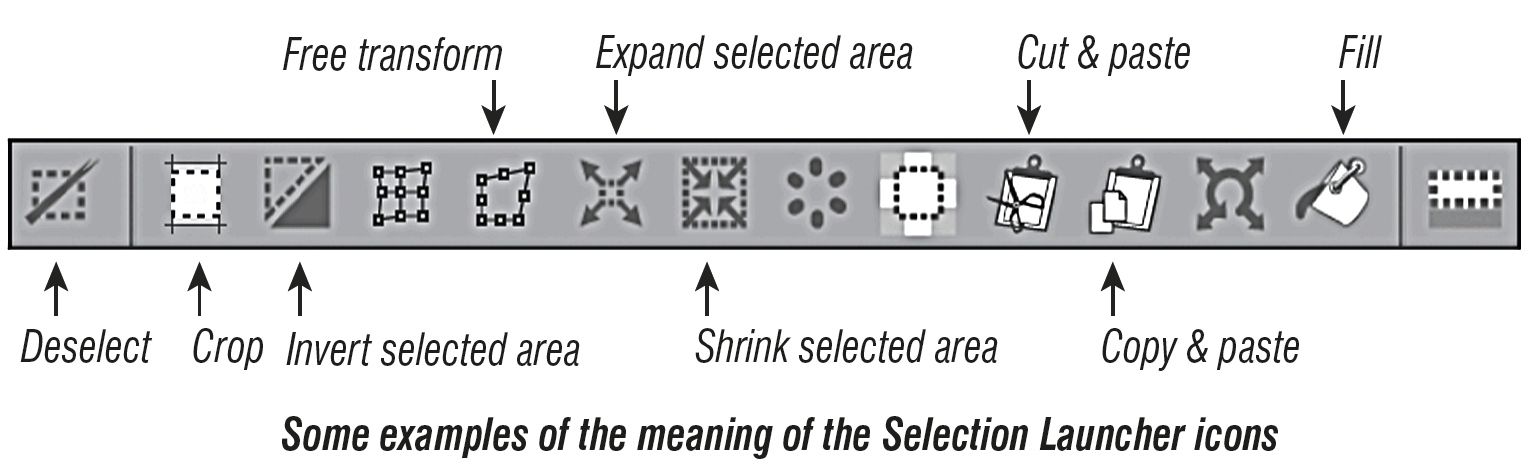
Whenever you have something selected in Clip Studio, you get this curious little row of icons appearing underneath the selection area.
![]()
This is the Selection Launcher.
If you don’t see it when you have an area selected, choose ‘Selection Launcher’ from the View menu at the top of the scree. I’ve found it to be pretty handy. It gives you quick access to all kinds of functions that can affect the selected area. Each function is represented by an icon in the palette and if you hover your cursor over an icon, a small piece of text will appear
to inform you what function the icon represents.
Like everything else in Clip Studio, the Launcher is endlessly editable.
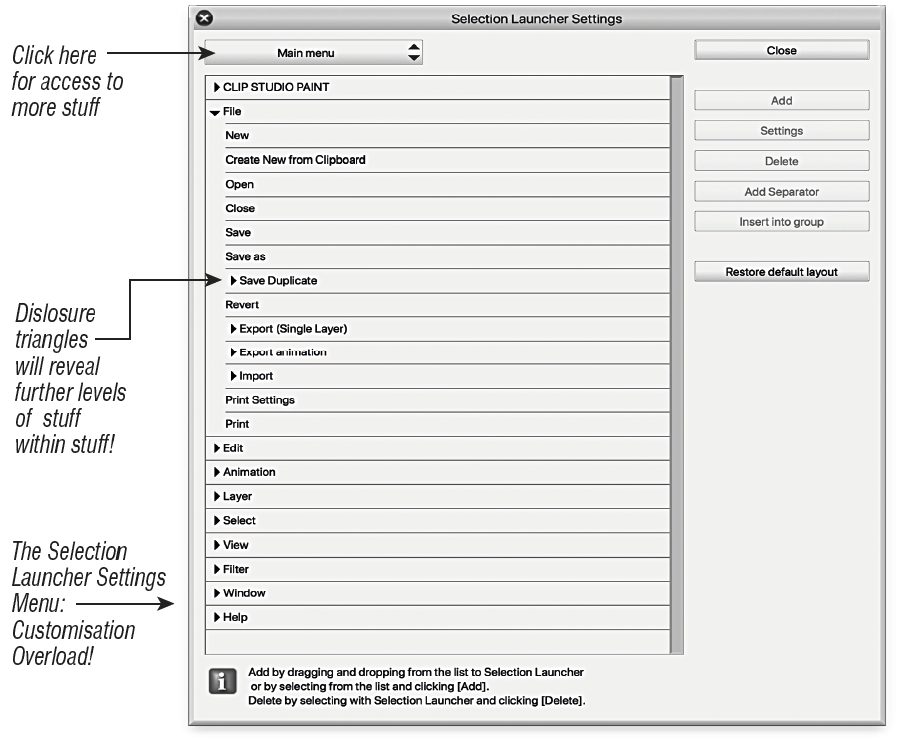
The best way to customise it is firstly make sure the Launcher is visible, then from the View menu choose Selection Launcher Settings… This will bring up the Selection Launcher Settings menuwhich will give you access to just about all the tools and functions that Clip Studio has.
To add anything from this menu to the Launcher, simply drag and drop into the Launcher, or select something in the Selection Launcher Settings list and click the ‘Add’ button. To delete something from the Launcher, click on it in the Launcher to highlight it, then press ‘Delete’ in the Launcher Settings window.
There’s also a handy ‘Restore default layout’ button.
The Selection Launcher can prove to be really convenient and useful especially if you work on a large screen, or maybe on two screens with a lot of your palettes on the second one.
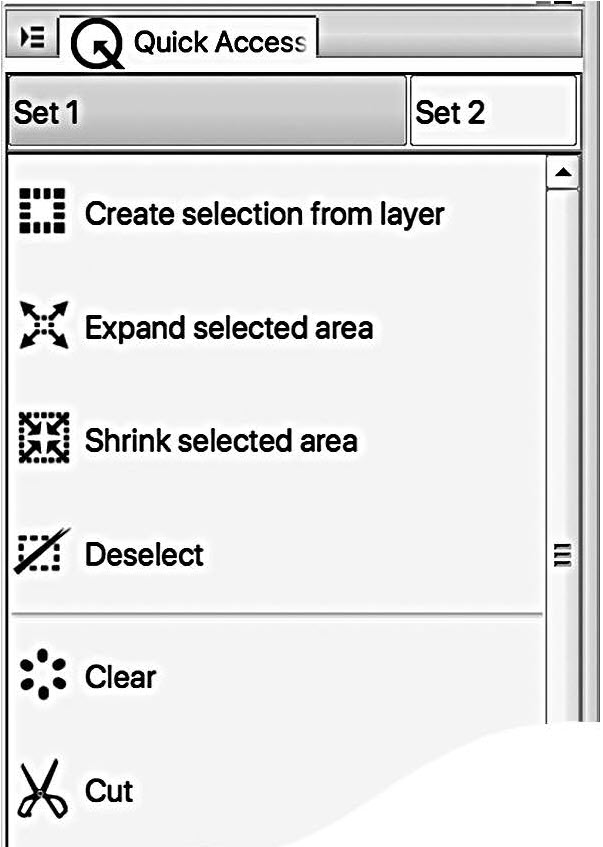
Now just to make things more confusing, there is another palette which also gives you a customisable list of tools and functions. It can contain all the same stuff as the Selection Launcher, or you can choose another set entirely. Or several sets.
This second palette that gives you quick access to functions and tools is known as the, er, Quick Access palette. It’s a permanently visible palette, ie not a floating one that appears only when a selection is active.
To see it, go to the Window menu at the top of your screen and choose Quick Access.
Customise it by choosing Quick Access settings from the bottom of the menu, or via this corner icon. A similar menu to the Launcher Settings menu appears, allowing you to drag and drop anything into the Quick Access menu.
Actually you need to specify how the drag and drop works by choosing ‘Change order’ from the drop down menu from the corner icon. You can choose to have just ‘Drag’ or (on a Mac) ‘cmd-drag’
You can drag and drop (depending on your choice of how that works) from the Quick Access palette straight into the Selection Launcher, and also rearrange the icons in the Launcher by dragging (again depending on your settings).

No comments yet.